

Deye All-in-One systems are designed to make solar battery installations simpler by combining the inverter, battery stack and gateway functions into one integrated system.
But as with any hybrid inverter and battery installation, a good result depends on good commissioning.
In a recent webinar training session, we covered three first install checks that can prevent confusion on site. These are not product faults, they are simple setup checks that help confirm the inverter is receiving the right information from the meter, CTs and Wi-Fi logger before the installer leaves.
Getting this right can help avoid unnecessary support calls, incorrect monitoring data and return visits.
So, before you pack up, check these three things.
1. Meter address
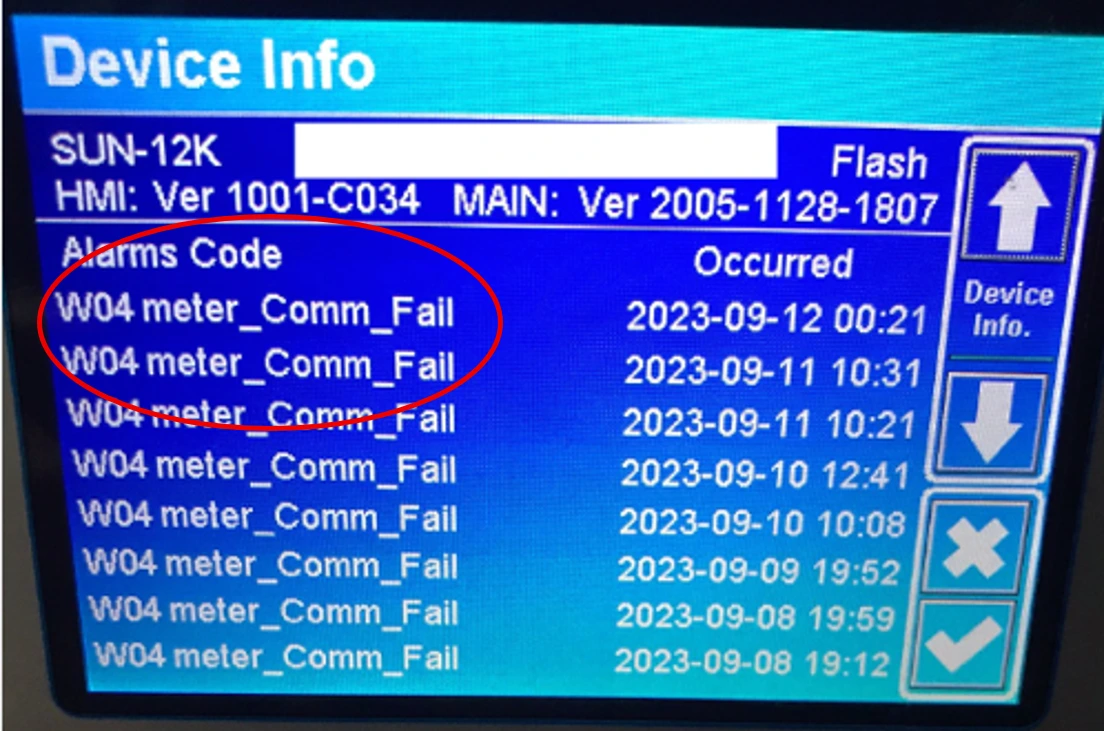
If two
meters are assigned the same address, the inverter may receive conflicting
data. This can lead to a W04 warning, or incorrect energy readings as
shown below.
The Answer:
- Meter 1 = 001
- Meter 2 = 002
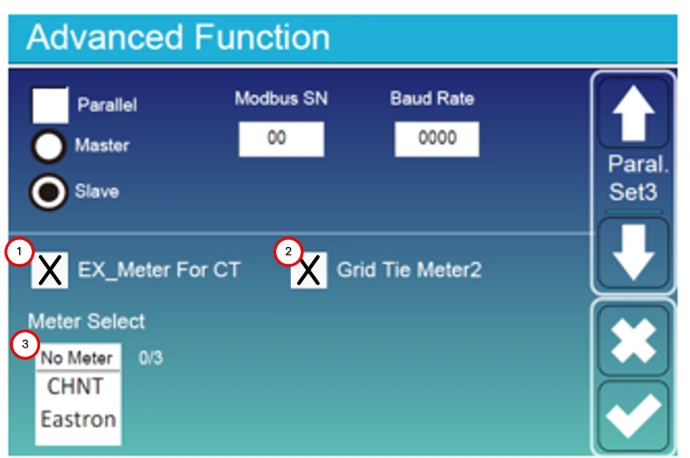
To set this up
1. Enable Ex_Meter For CT
2. Enable Gri d Tie Meter2
3. Under “Meter Select” Confirm Meter 2 = 002
4. Then connect Meter 1
5. Under “Meter Select” Confirm Meter 1 = 001, Meter 2 = 002
2. CT direction
CT direction is one of the easiest things to miss.
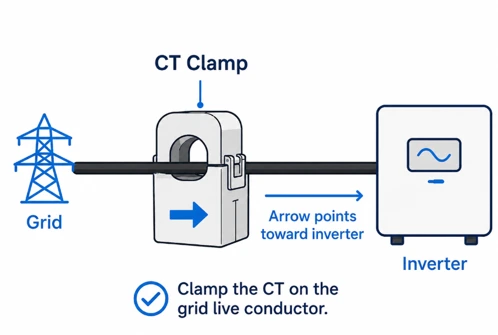
If the CT is facing the wrong way, the inverter may read import as export, or export as import. The system may be operating normally, but the data will look wrong.
That is when the customer may later say the app does not match what is happening on site.
The answer:
- The CT arrow should point toward the inverter
- The load reading should always be positive
- A known load should be turned on to confirm the reading makes sense
Quick check:
1. Arrow toward inverter
2. Known load test completed
3. Import/export readings make sense
3. Wi-Fi band
The Wi-Fi logger requires a 2.4 GHz network. Many modern routers combine 2.4 GHz and 5 GHz under one network name, which can cause connection issues.
Check before leaving site:
- 2.4 GHz Wi-Fi is enabled
- Logger is connected to the 2.4 GHz network
- Band steering is disabled if required on the router
- Logger is showing online
This simple step can prevent one of the most common monitoring-related support calls.
Final takeaway
Most first-install callbacks are not caused by product failure. They are usually caused by small commissioning checks that were missed before handover.
Before leaving site, check:
- Meter address
- CT direction
- Wi-Fi band.
Current or interested Deye installer?
Give our sales line a ring or send an email to sales@acsolarwarehouse.com with your Deye questions and learn about one of the most underrated products in Australia.
EMAIL SALES REGISTER YOUR DEYE INTEREST